Likeprovider Blog - SMM Panel News, Updates & Guides | Likeprovider.net

Likeprovider Blog

Latest news, updates, and tips about social media marketing

How to Factory Reset iPhone Safely (Step-by-Step Guide 2025)

How to Factory Reset iPhone Safely (Step-by-Step Guide 2025)

Performing a factory reset is one of the most effective ways to give your iPhone a fresh start. Whether you’re troubleshooting, selling your device, or simply starting over, knowing how to factory reset iPhone ensures your personal data stays secure while restoring optimal performance. In 2025, Apple has made the process simpler than ever — you can reset your device through Settings, iTunes, or even buttons. Below is a complete guide covering every scenario, including how to do it without a password or using buttons.


Why Factory Reset Your iPhone?

Over time, iPhones can slow down, accumulate unnecessary data, or experience software bugs. Resetting wipes everything — your apps, photos, settings, and stored accounts — returning your phone to its original factory condition. It’s also a must before selling or giving away your device.

Key reasons include:

  • Fixing persistent performance or software issues
  • Removing malware or system errors
  • Erasing all personal data before selling or gifting
  • Starting fresh after major iOS updates

How to Reset iPhone to Factory Settings

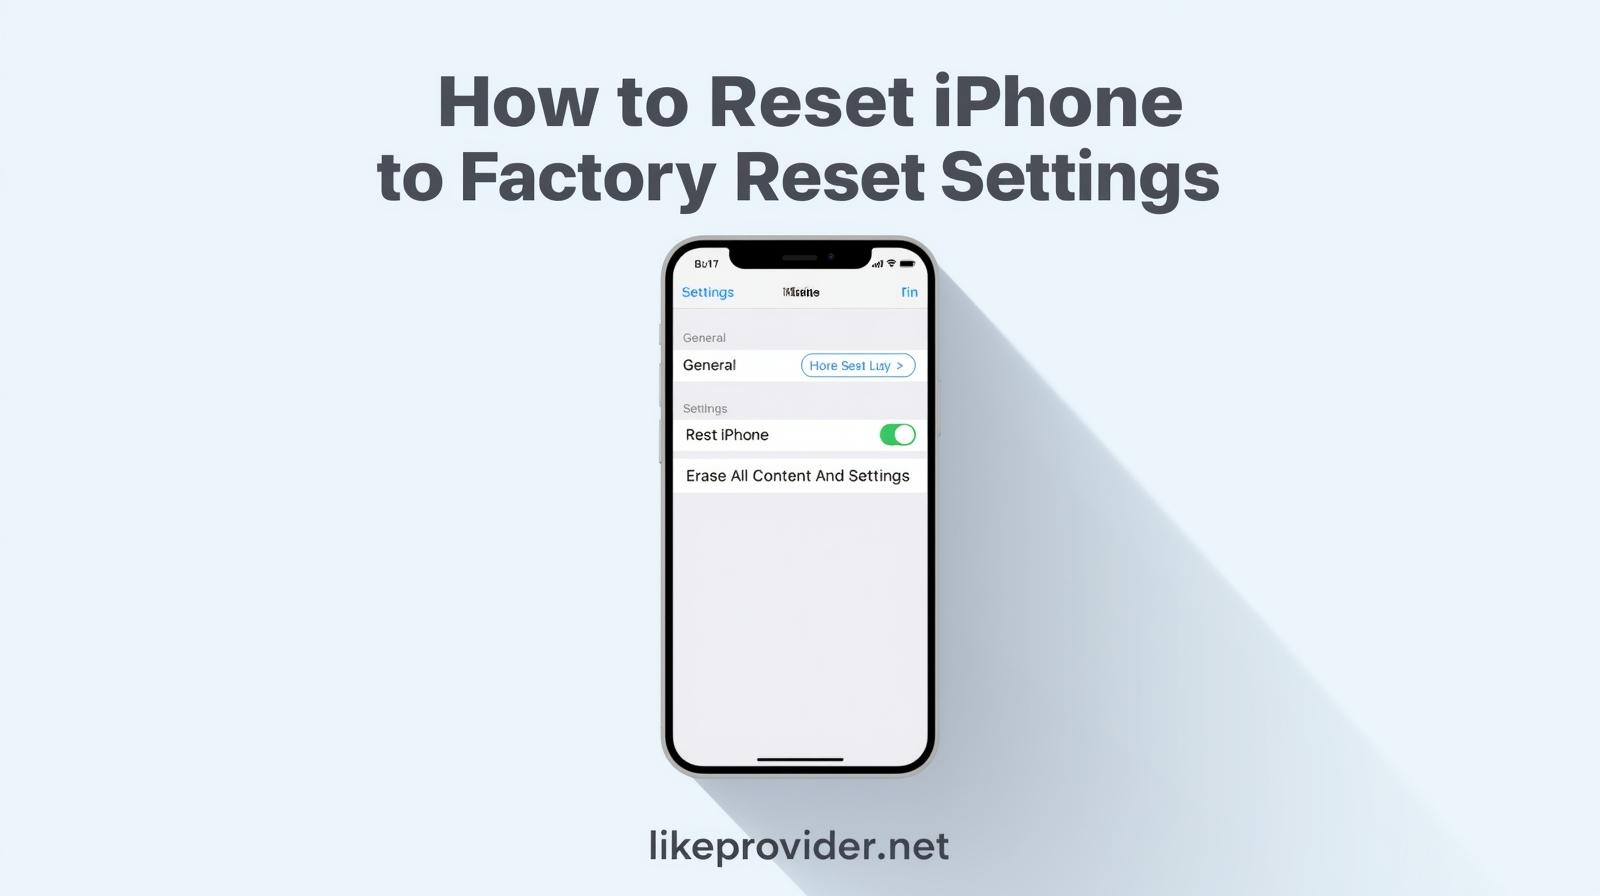
The easiest and most common method is through the Settings app. If your phone is unlocked, here’s how to reset iPhone to factory settings:

  1. Open Settings on your iPhone.
  2. Tap GeneralTransfer or Reset iPhone.
  3. Choose Erase All Content and Settings.
  4. Enter your passcode or Apple ID password when prompted.
  5. Tap Continue and confirm.

Your iPhone will restart and begin wiping all stored data. After a few minutes, it will reboot to the setup screen — just like when it was brand new.

how-to-factory-reset-iphone

How to Factory Reset iPhone Without Password

Forgot your passcode or Apple ID password? You can still perform a factory reset iPhone without password using iTunes or Finder.

Follow these steps:

  1. Connect your iPhone to a trusted computer.
  2. Open iTunes (or Finder on macOS).
  3. Force restart your iPhone to enter Recovery Mode:
    • iPhone 8 and later: Press and quickly release Volume Up, then Volume Down, then hold Side button until recovery mode appears.
    • iPhone 7/7 Plus: Hold Side + Volume Down together until you see the recovery screen.
    • iPhone 6s or earlier: Hold Home + Power button until the iTunes logo appears.
  4. When prompted on iTunes, choose Restore instead of Update.

Your iPhone will download the latest iOS and erase all content automatically. When done, it will restart and be ready for setup.


How to Factory Reset an iPhone Using iCloud

If you’ve lost your device or can’t access it physically, you can factory reset an iPhone remotely using iCloud:

  1. Go to iCloud.com/find.
  2. Sign in with your Apple ID.
  3. Click All Devices, then select your iPhone.
  4. Choose Erase iPhone, then confirm.

Your phone will reset once it connects to the internet. This is perfect if your iPhone is lost or stolen and you need to secure your data immediately.

how-to-factory-reset-iphone-restoring-after-reset

How to Factory Reset iPhone With Buttons

If your screen is frozen or your device won’t turn on properly, you can factory reset iPhone with buttons through Recovery Mode:

  1. Connect your iPhone to your computer via a cable.
  2. Force restart using your iPhone’s specific button combination (as shown above).
  3. When you see the Recovery Mode screen, open iTunes or Finder.
  4. Click Restore iPhone to begin the reset.

This method is especially useful when the Settings app is inaccessible.


Preparing Before a Factory Reset

Before erasing your phone, take a few essential steps to avoid problems later:

  • Backup your data: Save everything to iCloud or your computer.
  • Sign out of Apple ID: Go to Settings → [your name] → Sign Out.
  • Remove SIM and memory cards: Especially if selling your iPhone.
  • Disable Find My iPhone: This avoids activation lock issues after reset.

Completing these steps ensures a smooth reset process without losing important data.


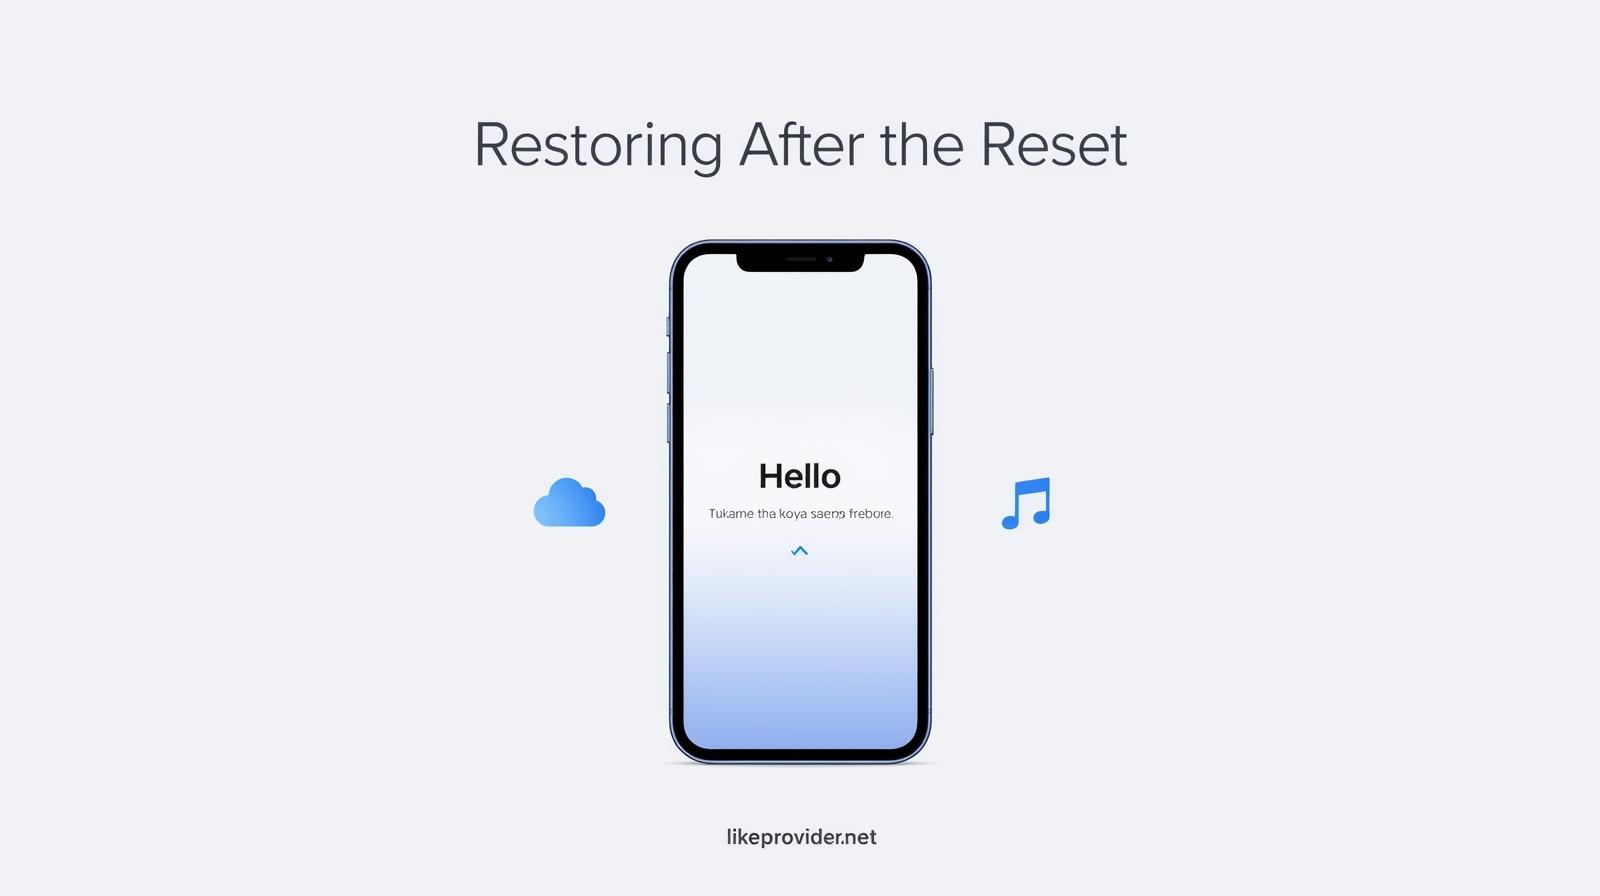
Restoring After the Reset

After completing your factory reset, the iPhone will restart and show the Hello screen. From here, you can:

  • Set up as New iPhone for a fresh start, or
  • Restore from iCloud or iTunes backup.

Reconnect to Wi-Fi and log in with your Apple ID to access your apps and files again.


Troubleshooting Reset Problems

If your iPhone doesn’t reset correctly, try the following:

  • Ensure your computer has the latest iTunes version.
  • Use a certified Apple cable.
  • Reboot both your iPhone and your computer.
  • Check your internet connection during restore.

If issues persist, visit the Apple Support Center for official repair guidance.


Is Factory Reset the Same as Hard Reset?

No — a factory reset erases all content and restores system settings, while a hard reset (force restart) only reboots your phone without deleting anything. Many users confuse these two, but they serve different purposes.


When Should You Factory Reset?

Consider resetting your iPhone if you notice any of these:

  • Unusual battery drain
  • Lag or freezing apps
  • Corrupted software updates
  • Forgotten passcode or Face ID issues
  • You’re switching to a new device

Performing a reset once or twice a year helps maintain smooth performance.


How to Keep Data Safe Before Reset

Before you factory reset, make sure your data is secure:

  • Use iCloud Backup (Settings → Your Name → iCloud → iCloud Backup → Back Up Now).
  • Or use Finder/iTunes to back up manually.
  • Double-check your backups by restoring them on another device if possible.

This ensures no photos, messages, or files are lost after the reset.


Final Thoughts

Learning how to factory reset iPhone is one of the smartest things you can do to protect your privacy and boost performance. Whether you’re preparing to sell your device, troubleshooting system issues, or simply starting fresh, following these steps will help you reset your iPhone safely and efficiently. Mastering how to factory reset iPhone ensures your data stays secure, your storage stays clean, and your phone works as smoothly as the day you bought it. From how to reset iPhone to factory settings to how to factory reset iPhone without password or even how to factory reset iPhone with buttons, each method in this guide provides a reliable way to restore your iPhone with confidence. Understanding how to factory reset iPhone properly will save you time, prevent errors, and keep your personal information fully protected every time you need to start over.

For more social media tools, explore our guide on Free Instagram followers and discover how to save and manage your favorite clips easily.

En savoir plus
How to Reset AirPods: A Complete Step-by-Step Guide

How to Reset AirPods: A Complete Step-by-Step Guide

AirPods are among Apple’s most popular accessories, known for their seamless connection and premium audio experience. But sometimes, even the best tech can run into issues—like connection drops, sound glitches, or one AirPod not charging. In such cases, knowing how to reset AirPods properly can save you a trip to the Apple Store.

This complete guide will walk you through the reset process for every AirPods model, including how to reset AirPods Pro, how to factory reset AirPods, and how to reset AirPods Max — in an easy, human-friendly way.


Why You Might Need to Reset Your AirPods

Resetting your AirPods isn’t just for when they stop working completely. It’s a simple fix that can solve many common problems:

  • Your AirPods won’t connect to your iPhone, iPad, or Mac
  • One AirPod is not charging or playing sound
  • Audio lags or cuts out
  • The microphone isn’t picking up your voice clearly
  • You want to pair your AirPods with a new device

In other words, if your AirPods start acting strange, resetting AirPods should be the first troubleshooting step you try.


How to Reset AirPods (All Models)

Let’s start with the standard models before moving on to the Pro and Max versions. Here’s how you can reset AirPods in just a few seconds:

  1. Put both AirPods in their charging case.
  2. Close the lid and wait about 30 seconds.
  3. Open the lid again.
  4. On your iPhone or iPad, go to Settings → Bluetooth.
  5. Tap the “i” icon next to your AirPods’ name and choose Forget This Device. Confirm your choice.
  6. Hold the setup button on the back of the case for about 15 seconds, until the status light flashes amber, then white.
  7. Now your AirPods are fully reset and ready to reconnect.

You can then pair them again by opening the case near your iPhone and following the on-screen setup.

how-to-reset-airpods-likeprovider-net

How to Reset AirPods Pro

If you have Apple’s premium version, how to reset AirPods Pro follows a very similar process, but there are a few model-specific things to note.

  1. Place both AirPods Pro in their charging case.
  2. Close the lid and wait for 30 seconds.
  3. Open the lid again.
  4. On your iPhone, go to Bluetooth settings and tap Forget This Device next to your AirPods Pro.
  5. Hold the setup button on the back of the case for 15 seconds, until the light changes from amber to white.

That’s it! You’ve learned how to reset AirPods Pro successfully. The white light means your AirPods Pro are now in pairing mode and can be connected to any Apple or non-Apple device.


How to Factory Reset AirPods

If you’re planning to give away or sell your AirPods, performing a full factory reset on AirPods ensures all previous device data is removed.
This process unlinks your AirPods from your Apple ID and erases their memory of previous connections.

Follow these steps to factory reset AirPods:

  1. Go to Find My app → Devices tab → AirPods.
  2. Choose Remove This Device to unlink from iCloud.
  3. Then follow the normal reset steps (press and hold the setup button for 15 seconds).

Now your AirPods are clean and ready for a new owner or device setup.

Tip: A factory reset on AirPods is also helpful if your AirPods won’t pair with any device, even after a standard reset.


How to Reset AirPods Max

Apple’s over-ear headphones have a different reset process. If you’re wondering how to reset AirPods Max, follow these quick steps:

  1. Make sure your AirPods Max are charged.
  2. Press and hold the Noise Control button and the Digital Crown simultaneously.
  3. Keep holding for 15 seconds until the LED indicator flashes amber, then white.
  4. Release the buttons and wait for the reboot.

This method is effective if you’re facing Bluetooth pairing issues or random disconnects. If you want a full factory reset of AirPods Max, press and hold both buttons for about 20 seconds, until the light turns amber twice before flashing white.


What Happens After Resetting Your AirPods

Once you’ve completed the reset, your AirPods act like brand new. All custom settings—like double-tap actions, noise control preferences, and automatic ear detection—return to default.

When reconnecting to your device, you’ll need to reconfigure any settings you previously adjusted. However, your AirPods will likely work smoother and more reliably afterward.


Troubleshooting After Reset

If you’ve followed every step on how to reset AirPods and your device still doesn’t connect properly, try the following:

  • Ensure your iPhone or iPad is updated to the latest iOS version.
  • Clean your AirPods and charging case connectors.
  • Try pairing with another device to isolate the issue.
  • Restart your iPhone before reconnecting.

Most connection and sound problems disappear after these steps. However, if your AirPods remain unresponsive, visit Apple’s official support page for service options.

If you’re looking to boost your social media growth, explore our offer to use the best SMM panel trusted by thousands of creators worldwide.

how-to-reset-airpods-troubleshooting-likeprovider-net

How to Avoid Needing a Reset in the Future

Resetting your AirPods should be rare if you maintain them properly. To prevent future issues:

  • Keep your firmware updated automatically by connecting to an Apple device regularly.
  • Avoid using third-party chargers.
  • Store AirPods in their case when not in use.
  • Clean the charging ports with a soft, dry cloth.

These small habits go a long way toward keeping your AirPods running smoothly and preventing the need for frequent resets.


Final Thoughts

Learning how to reset AirPods is a simple yet essential skill for every Apple user. Whether it’s the classic AirPods, AirPods Pro, or AirPods Max, resetting can fix most issues instantly—saving you time, stress, and sometimes even money.

By following this easy guide, you can quickly factory reset AirPods or reset AirPods Max whenever needed, ensuring your listening experience stays perfect.

For more official troubleshooting steps and updates, visit the Apple AirPods Support page.

En savoir plus
How to Cancel YouTube TV Easily (2025 Updated Guide)

How to Cancel YouTube TV Easily (2025 Updated Guide)

If you’ve been thinking about cutting down your streaming expenses or you simply no longer need YouTube TV, learning how to cancel YouTube TV is a smart first step. YouTube TV offers dozens of live channels, a cloud DVR, and premium add-ons, but many users eventually want to pause or fully cancel their membership. The cancellation process is simple once you know where everything is located, but the menus vary between web, Android, and iOS — which confuses most users. This guide walks you through everything in a clear, human-style format so you can cancel smoothly without being charged again.

Before getting into the steps, it’s important to understand that YouTube TV does not immediately remove your access after cancellation. You will still have access through the end of your billing cycle, and some recordings may disappear depending on your account. This guide covers every variation including how to cancel YouTube TV subscription, how to cancel YouTube TV free trial, how to cancel my YouTube TV subscription, and how to cancel a YouTube TV subscription on any device.

Why People Look for How to Cancel YouTube TV

Subscription fatigue is becoming extremely common. Streaming services keep increasing their monthly prices, and users often subscribe to more platforms than they actually use. YouTube TV can be convenient, but if you’re not watching live TV often or you only needed the service temporarily, canceling is the most effective way to avoid unnecessary charges. Understanding how to cancel YouTube TV gives you full control over your subscription so nothing renews without your permission.

What Happens When You Cancel YouTube TV

Before you cancel, it’s helpful to know what will change afterward:

• Your membership stays active until the next billing date
• Premium add-ons are removed immediately upon cancellation
• Cloud DVR recordings may no longer be accessible
• Your account will pause until you decide to reactivate

These points apply whether you’re following how to cancel YouTube TV subscription or simply canceling the free trial before the renewal hits.

How to Cancel YouTube TV on the Web

This is the easiest method and the one most users prefer. If you want a fast and clear path for how to cancel YouTube TV, do it from a desktop browser.

  1. Go to the YouTube TV website
  2. Sign in to your Google account
  3. Click your profile picture in the top-right
  4. Select “Settings”
  5. Go to “Membership”
  6. Choose “Manage”
  7. Click “Cancel” or “Deactivate Membership”

After confirming the step, your membership will stop renewing. This is the most reliable method for how to cancel my YouTube TV subscription.

how-to-cancel-youtube-tv-guide-likeprovider

How to Cancel YouTube TV Subscription on iPhone (iOS)

If you subscribed through Apple, cancellation must be done through the App Store — not the YouTube TV app.

  1. Open Settings on your iPhone
  2. Tap your Apple ID at the top
  3. Select “Subscriptions”
  4. Find YouTube TV in the list
  5. Tap “Cancel Subscription”

This applies to both paid plans and the free trial, making it useful for anyone searching how to cancel YouTube TV free trial.

How to Cancel YouTube TV on Android

If you’re an Android user, the steps differ slightly depending on whether billing is through Google Play or directly through YouTube.

To cancel through the YouTube TV app:

  1. Open YouTube TV
  2. Tap your profile icon
  3. Select “Settings”
  4. Go to “Membership”
  5. Tap “Deactivate Membership”

If you subscribed through Google Play:

  1. Open Google Play Store
  2. Tap your profile photo
  3. Select “Payments & Subscriptions”
  4. Open “Subscriptions”
  5. Choose YouTube TV and cancel

These steps also apply to how to cancel a YouTube TV subscription for Android devices.

You can also send free YouTube views to your channel as support through our site.

How to Cancel YouTube TV Free Trial (Before You Get Charged)

Many people start YouTube TV with its free trial and forget to cancel before the billing date. The trial converts into a paid subscription automatically unless you manually cancel it.

To cancel the trial:

• Go to Membership → Deactivate Membership (Web)
• Use App Store → Subscriptions (iPhone)
• Use Google Play → Subscriptions (Android)

The free trial version uses the same cancellation process as a paid plan, so the standard how to cancel YouTube TV steps all apply.

How to Cancel YouTube TV on Smart TV

Smart TVs do not allow direct cancellation from the app. You can sign out or remove the app, but the billing continues unless you cancel from a phone or computer.

To finish the process:

• Use a web browser for the fastest cancellation
• Or cancel through your Apple ID or Google Play account

This is important for users who subscribe on TV but later search how to cancel YouTube TV subscription and can’t find the option inside the TV app.

how-to-cancel-youtube-tv-smart-tv-likeprovider

How to do it?

If you want the fastest method for how to cancel YouTube TV, the web browser is the easiest route. Simply sign in to YouTube TV, click your profile picture, open the Settings menu, and select Membership. Here, the “Deactivate Membership” option will appear clearly, and clicking it will stop all future billing. For iPhone users, the process is different: open your Apple ID settings, tap Subscriptions, find YouTube TV, and cancel it directly from there. Android users can either cancel through the YouTube TV app or through Google Play Subscriptions depending on their billing method. Free trial cancellations follow the same steps — you just need to complete them before the end of the trial period so you don’t get charged. No matter which device you’re using, the key is reaching the Membership or Subscriptions section and disabling auto-renewal. Once canceled, your account stays active until your billing cycle ends.

Final Thoughts

Understanding how to cancel YouTube TV gives you full flexibility over your subscription and prevents unwanted charges. Whether you’re ending your free trial, switching to another streaming service, or simply reducing monthly expenses, the steps above ensure the process is quick, smooth, and fully under your control. You can always reactivate later with a single click if you choose to return.

Verify YouTube’s official cancellation instructions via the YouTube Help Center.

En savoir plus
How to Get More Followers on Kick: Proven Strategies for 2025

How to Get More Followers on Kick: Proven Strategies for 2025

If you want to stand out as a creator, knowing how to get more followers on Kick is essential. Kick is rapidly becoming one of the fastest-growing streaming platforms of 2025, offering creators higher revenue shares and more freedom. But success doesn’t happen overnight — it comes from applying the right Kick growth strategies consistently.

Understand the Kick Algorithm and How to Get More Followers on Kick

Kick’s algorithm rewards consistent engagement, watch time, and audience interaction. The more your viewers chat, like, and follow, the higher your channel appears in discovery sections.
Stream regularly, even if it’s just short sessions. Being live often boosts visibility and helps grow Kick followers fast.

Optimize Your Kick Profile to Increase Followers on Kick

Your profile is your digital storefront. To attract and gain real followers on Kick, make sure your channel looks professional:

  • Use a clear, branded profile picture
  • Write a bio that naturally includes how to get more followers on Kick keywords
  • Design a banner with your name and streaming schedule

Small visual improvements help build trust and push casual viewers to hit “Follow.”

how-to-get-more-followers-on-kick

Consistent Streaming: The Heart of Kick Growth Strategy

One of the best ways to increase followers on Kick is by being consistent.
Set a streaming calendar and stick to it. If people know when you go live, they’ll show up again and again.
The Kick algorithm favors reliability — consistent creators grow faster and get recommended more.

Engage With Your Community and Grow Kick Followers Fast

Engagement is everything. Ask questions, reply to chat messages, and remember regular viewers. When fans feel connected, they stay longer and share your stream.
You can also host polls or small giveaways to reward your audience. Authentic engagement is the real secret to how to get more followers on Kick.

Collaborate With Other Creators to Grow on Kick

Collaboration is one of the easiest ways to grow on Kick. When you stream with others in your niche, you get exposed to new viewers instantly.
Pick creators with similar content styles — for example, if you’re a gaming streamer, collaborate with others playing trending titles.

Promote Your Kick Channel Across Social Media

Don’t rely solely on Kick discovery. Share your live links on TikTok, Instagram, or Twitter.

  • Upload short clips or funny moments from your Kick streams.
  • Post updates on when you’ll go live.
  • Use hashtags like #KickStreaming and #KickFollowers.

Cross-promotion brings new audiences and helps gain real followers on Kick organically.

Upgrade Your Stream Quality and Visual Appeal

No one enjoys watching a laggy or dark stream. Improve your setup step by step:

  • Use a ring light or soft lighting
  • Invest in a clear microphone
  • Add overlays with your branding and schedule

Professional streams instantly increase the chance of new followers. Viewers remember quality and return more often.

For official streaming guidelines and feature updates, visit the Kick Help Center and stay informed about Kick’s latest tools and community rules.

Analyze, Adapt, and Keep Growing on Kick

The best creators constantly review analytics. Notice what works — which streams attract the most viewers, what time slots perform best, and what topics get the most chat activity.
Repeat successful patterns and drop what doesn’t perform. Data-driven growth is how professionals get more followers on Kick over time.

how-to-get-more-followers-on-kick-2025

Stay Authentic and Persistent

The biggest secret of all? Don’t fake your personality. Kick audiences love real, relatable streamers. Keep improving your skills, maintain positivity, and trust the process.
With the right consistency and engagement, you’ll soon see a steady rise in your follower count.

Final Thoughts on How to Get More Followers on Kick

Learning how to get more followers on Kick is about more than numbers — it’s about building a genuine community. When you deliver entertaining content, show authenticity, and stay consistent, your Kick channel will grow naturally, bringing you loyal followers who truly care about your content.

Boost your streaming visibility and get real engagement — explore our offer to Kick SMM Panel for affordable and high-quality Kick followers, views, and likes.

You may also find our guide on getting free Kick followers helpful — check it out here:

En savoir plus
How to Delete an Instagram Account: A Complete Step-by-Step Guide

How to Delete an Instagram Account: A Complete Step-by-Step Guide

Deleting your Instagram account can be an emotional but necessary step — whether you’re taking a break from social media or permanently leaving the platform. In this complete guide, you’ll learn how to delete an Instagram account safely, what happens to your data afterward, and how to deactivate it temporarily if you plan to return later.

Why You Might Want to Delete Your Instagram Account

There are many reasons users choose to remove their accounts. Some need a break from constant scrolling, while others want to protect their privacy or simply start fresh. Whatever your reason, understanding what happens when you delete your account helps you decide the right approach.

Common reasons include:

  • Reducing screen time and distraction
  • Protecting privacy and data
  • Avoiding negative social comparison
  • Starting over with a new identity or brand

Before continuing, remember that how to delete an Instagram account permanently means all your posts, comments, and followers will be removed forever.

How to Delete an Instagram Account on a Phone

Deleting your Instagram from a mobile device is simple — though it must be done through a browser, not the app itself.

Steps to follow:

  1. Open your browser and go to the Instagram account deletion page.
  2. Log in with the account you wish to delete.
  3. Choose a reason for deletion from the list.
  4. Re-enter your password.
  5. Tap Delete [username] to confirm.

Once confirmed, your profile becomes hidden and will be permanently deleted after 30 days.

how-to-delete-an-instagram-account-phone

How to Delete an Instagram Account on Desktop

If you prefer using your computer, the process is just as easy.

  1. Visit the same delete page on your desktop browser.
  2. Log in using your Instagram credentials.
  3. Select a reason for deletion.
  4. Enter your password again.
  5. Click Delete Account to confirm.

Instagram gives you 30 days in case you change your mind. If you log in during that time, your account will be restored automatically.

How to Deactivate Instagram Temporarily

If you want to take a break without losing everything, deactivating your account is the best option.

Here’s how to disable it:

  1. Log in via browser (app won’t work).
  2. Go to your Profile and click Edit Profile.
  3. Scroll down to Temporarily disable my account.
  4. Choose a reason and enter your password.
  5. Click Temporarily Disable Account.

Your profile, posts, and followers will stay hidden until you log back in again.

What Happens After You Delete Your Instagram Account

When you confirm how to delete an Instagram account permanently, Instagram waits 30 days before final removal. After that:

  • All photos, reels, and posts are erased forever.
  • Comments and likes disappear.
  • Your username may become available to others.
  • Messages sent to others will also be deleted.

If you ever plan to come back, it’s smart to back up your data first.

How to Download Your Instagram Data Before Deleting

You can download your data to keep all your posts, messages, and settings safe.

  1. Open the Instagram app or web version.
  2. Go to Settings → Privacy and Security → Data Download.
  3. Enter your email and password.
  4. Instagram will send you a download link with all your information.

This backup includes photos, videos, messages, and account info — great for saving memories or switching platforms later.

how to download instagram data before deleting account

Common Problems While Deleting Your Account

If you face issues while trying to remove your account:

  • Make sure you’re logged into the right profile.
  • Try using a browser instead of the app.
  • Clear cookies or use Incognito mode if the page doesn’t load.
  • Double-check your password.

Still can’t delete it? Visit the Instagram Help Center for official troubleshooting support.

Final Thoughts

Learning how to delete an Instagram account gives you control over your digital life. Whether you want to leave social media behind or simply reset your online presence, these methods help you do it safely and completely.

Remember — you can always come back later and start over fresh with a new perspective on social media balance.

For more social media services, check out our offer at free Instagram likes.

En savoir plus
How to Take a Screenshot on Windows – Complete 2025 Guide

How to Take a Screenshot on Windows – Complete 2025 Guide

Learning how to take a screenshot on Windows is one of the simplest yet most essential skills for any computer user. Whether you’re showing a tutorial, saving proof of payment, or sharing a funny meme, knowing the right shortcuts saves time and effort. Windows makes it easy to capture your screen in several ways, from keyboard shortcuts to built-in tools.

How to Take a Screenshot on Windows 11

If you’re using the latest Microsoft system, learning how to take a screenshot on Windows 11 is quick. Press Windows + PrtScn to capture the entire screen instantly. Your screenshot will be saved automatically in the “Pictures → Screenshots” folder.

For more control, try Windows + Shift + S. This opens Snipping Tool (formerly Snip & Sketch). Your screen dims, and you can drag to select the exact area you want. Once captured, a small preview appears in the corner; click it to annotate or save.

You can also press Alt + PrtScn to capture only the active window. It’s a simple shortcut that prevents unnecessary cropping later.

How to Take a Screenshot on Windows 10

Many users still prefer Windows 10, and the process of taking a screenshot on Windows 10 is nearly identical. The PrtScn key remains your best friend. Press it once to copy the whole screen to your clipboard, then paste it into Paint, Word, or any image editor with Ctrl + V.

Another method is Windows + PrtScn, which automatically saves the image. Or, if you only need a small part of the screen, open the Snipping Tool via the Start menu. Click “New,” select the area you want, and save or edit your shot directly.

Using Snipping Tool and Snip & Sketch on Windows

The Snipping Tool has been part of Windows for years, and it remains one of the most flexible ways to take a screenshot on Windows. You can choose between rectangular, freeform, window, or full-screen modes. This is ideal for detailed work—like highlighting part of a document or creating tutorials.

The newer Snip & Sketch app is even more streamlined. Shortcut Windows + Shift + S lets you snip instantly without opening a separate app first. After capturing, you can crop, draw, or share your image within seconds.

How to Take a Screenshot on Windows Acer Laptops

If you own an Acer device, don’t worry—the steps are the same. Acer keyboards often label the key as PrtSc or Prt Scn. To take a screenshot on Windows Acer, simply press Fn + PrtScn if the key is shared with another function, or use Windows + PrtScn for an automatic save.

On some models, you may need to press Fn + Alt + PrtScn to capture the active window. Check your keyboard layout to be sure which combination applies.

How to Take a Screenshot on Chromebook Without Windows Key

If you’re using a Chromebook that lacks a Windows key, there’s still a quick fix. To take a screenshot on Chromebook without Windows key, press Ctrl + Show Windows ( F5 ) for a full-screen capture. For a partial screenshot, press Ctrl + Shift + Show Windows ( F5 ) and drag over the section you want.

Although it’s not technically Windows, many users search this because they move between systems. The logic is the same: one shortcut for full screen, another for area selection.

If you’re also using a Mac, you can check out our detailed guide here:
👉 How to Take a Screenshot on Mac (2025 Step-by-Step Guide)

How to Take a Screenshot on Windows Using Keyboard Shortcuts

Keyboard shortcuts are the fastest way to take a screenshot on Windows. Here are the most common ones you should memorize:

  • PrtScn: Copies the entire screen. Paste into Paint or Word.
  • Windows + PrtScn: Saves the entire screen automatically.
  • Alt + PrtScn: Captures only the active window.
  • Windows + Shift + S: Opens Snip & Sketch for precise captures.
  • Windows + G: Opens Xbox Game Bar for screenshots in games.

All of these shortcuts work across most laptops and PCs, including HP, Dell, and Acer models.

How to Take a Screenshot on Windows While Gaming

If you’re playing a game or watching a full-screen video, you can still capture the moment. Press Windows + G to open the Xbox Game Bar, then click the camera icon or use Windows + Alt + PrtScn. Screenshots are saved in “Videos → Captures.” This method is perfect for recording gaming achievements or high-quality visuals.

how-toa-take-a-screenshot-on-windows-while-gaming

Other Ways to Take a Screenshot on Windows

Sometimes the built-in options aren’t enough. That’s where third-party tools come in handy.

  • Lightshot offers fast editing and direct sharing links.
  • ShareX is a professional-grade open-source program with automation and scrolling capture.
  • Greenshot is lightweight and integrates smoothly with cloud services.

These tools help if you frequently capture and edit images for blogs, guides, or professional work.

How to Take a Screenshot on Windows and Edit It

After taking your screenshot, open Paint or any editing software to make improvements. Use the crop tool to focus on the important part, highlight details with arrows, or blur sensitive information.

For quick edits, Snip & Sketch already includes basic tools like pen, highlighter, and ruler. You can also use Ctrl + S to save the file immediately after annotating.

Why Learning How to Take a Screenshot on Windows Matters

Screenshots are crucial for communication. They save time when you need to explain a technical issue, demonstrate a process, or document an event. Knowing how to take a screenshot on Windows 11 or older versions ensures you can share visuals efficiently across platforms.

If you switch between devices, learning how to take a screenshot on Chromebook without Windows key is equally valuable. The concept remains the same—capture, save, and share instantly.

why-learning-how-to-take-a-screenshot-on-windows-matters

Final Thoughts

Mastering how to take a screenshot on Windows gives you freedom to capture anything on your screen effortlessly. From full-screen grabs to quick snippets, Windows offers multiple built-in methods that fit every user’s needs. Once you know your favorite shortcut, taking screenshots becomes second nature.

For official shortcut details and troubleshooting tips, visit the Microsoft Support Center.

En savoir plus
How to Screen Record on Mac (2025 Step-by-Step Guide)

How to Screen Record on Mac (2025 Step-by-Step Guide)

Screen recording on Mac is an essential feature for anyone who wants to create tutorials, record gameplay, or capture live presentations. Whether you’re an educator, developer, or content creator, knowing how to screen record on Mac can save time and boost productivity. In this complete 2025 guide, we’ll show you every method available—from built-in shortcuts to advanced recording tools.


How to Screen Record on Mac Using Built-in Shortcuts

The fastest way to capture your screen is by using Apple’s built-in keyboard shortcut.
Follow these simple steps to record your Mac screen:

  1. Press Command (⌘) + Shift + 5 on your keyboard.
  2. The screenshot toolbar will appear at the bottom of the screen.
  3. Click Record Entire Screen or Record Selected Portion.
  4. Press Record to start recording.
  5. When you’re done, click the Stop icon in the menu bar.

This built-in feature makes how to record screen on mac extremely easy and doesn’t require any third-party apps.

For more useful video and screen recording tools, explore our free youtube subscribers. 


How to Screen Record on Mac with Audio

By default, macOS only records video—if you want audio, you’ll need to adjust settings.
Here’s how to record both screen and audio:

  1. Open the Screenshot Toolbar with Command + Shift + 5.
  2. Click Options.
  3. Under Microphone, select Built-in Microphone.
  4. Start recording normally.

Now your video will include any sound picked up by your Mac’s mic. This method is ideal for recording tutorials, commentary, or video walkthroughs.

If you need system audio (e.g., internal sound from the Mac), consider using QuickTime Player or third-party tools like OBS Studio or ScreenFlow for more flexibility.

how-to-screen-record-on-mac-with-audio-likeprovider-net

How to Record Screen on Mac Using QuickTime Player

QuickTime Player is a powerful native app that can also handle screen recording.

  1. Open QuickTime Player.
  2. Go to File > New Screen Recording.
  3. Click the arrow icon next to the record button to choose the microphone input.
  4. Select whether to record the entire screen or a portion.
  5. Click Record to start capturing.

When you finish, click Stop in the menu bar. Then, QuickTime Player automatically opens the video for you to preview and save.

This method is perfect for users who prefer how to screen record on mac with audio using a built-in app without any setup.


How to Stop Screen Recording on Mac

To stop your recording:

  • Click the Stop icon in the top menu bar (near the clock).
  • If using QuickTime Player, click Stop Recording in the control bar.

After stopping, macOS automatically saves your video to the Desktop by default. You can change the save location in the Options menu of the screenshot toolbar.

Knowing how to stop screen recording on mac helps ensure your file is properly saved and prevents data loss during capture.


How to Screen Record on a Mac with External Apps

If you need more control or advanced editing tools, try these third-party options:

  • OBS Studio: Free and open-source software with audio mixing and advanced recording.
  • ScreenFlow: Paid tool with built-in video editing.
  • Camtasia: Great for professional-quality tutorials and animations.

These apps provide better quality, multiple audio sources, and annotations, making how to screen record on a mac much more versatile for professional use.


Tips for Better Screen Recordings

  • Always close unnecessary tabs or apps before recording.
  • Enable Do Not Disturb mode to avoid pop-ups.
  • Record in 1080p or higher for crisp video quality.
  • Use an external microphone for cleaner audio.

These small details can dramatically improve your final video output.


Common Problems and Fixes

Issue 1: No sound recorded

  • Check that the correct microphone is selected under Options > Microphone.

Issue 2: Poor video quality

  • Increase resolution or frame rate in advanced apps like OBS.

Issue 3: Recording not saving

  • Confirm your destination folder in the screenshot toolbar settings.

By addressing these simple issues, you’ll never struggle with how to screen record on mac again.

how-to-screen-record-on-mac-common-problems-fixes-likeprovider-net

Final Thoughts

Learning how to screen record on mac opens up endless possibilities—whether you’re capturing meetings, creating tutorials, or recording gameplay. From macOS’s built-in tools to advanced software like OBS and ScreenFlow, every method provides flexibility and quality.

Once you master these steps, you can record, edit, and share your videos effortlessly, ensuring you get professional results every time.

Verify Apple’s official instructions at the Apple Support page.

En savoir plus
How to Rip Audio from YouTube: The Ultimate 2025 Guide to Extract Music Effortlessly

How to Rip Audio from YouTube: The Ultimate 2025 Guide to Extract Music Effortlessly

If you’ve ever found a song, podcast, or background sound on YouTube that you want to listen to offline, learning how to rip audio from YouTube is the perfect solution. Whether it’s a relaxing playlist, an inspirational speech, or a rare live performance, extracting audio allows you to enjoy it anytime without internet access.

Before we dive in, it’s important to note that you should only rip audio from YouTube for personal use or when you have the right to download that content.

Why People Rip Audio from YouTube

YouTube has become the largest media platform in the world. Millions of users rip audio for various reasons:

  • To listen to favorite tracks offline.
  • To save podcasts or motivational talks.
  • To use background music in personal projects.
  • To convert long videos into lightweight audio files for storage.

Whatever your reason, knowing how to rip audio from YouTube properly helps you do it safely and efficiently.

Best Tools to Rip Audio from YouTube (2025 Updated List)

If you want a quick, high-quality extraction, several tools can help. Here are the most popular options:

  1. 4K YouTube to MP3 – Converts entire playlists and channels into audio files effortlessly.
  2. YTMP3 – A free web-based converter perfect for one-time rips.
  3. Y2Mate – Another simple tool to convert and download audio directly from YouTube links.
  4. ClipGrab – A desktop app that allows multiple format options (MP3, AAC, OGG).
  5. FreeDownloadTools.com – A reliable site for safe and fast YouTube to MP3 conversions.

All these tools can extract high-quality MP3 files quickly.

Step-by-Step: How to Rip Audio from YouTube

  1. Copy the URL of the YouTube video you want to extract.
  2. Go to a trusted YouTube to MP3 converter website or app.
  3. Paste the copied URL into the converter’s input box.
  4. Choose the desired audio format (MP3, M4A, WAV).
  5. Click Convert or Start and wait for the process to complete.
  6. Download the ripped audio file to your device.

That’s it! In less than a minute, you can have your favorite audio saved offline.

Is It Legal to Rip Audio from YouTube?

This is a common question. The legality depends on the purpose. If you are downloading copyrighted songs or music without permission, it’s against YouTube’s terms of service. However, ripping audio for personal use, educational purposes, or with the creator’s consent is generally acceptable. Always respect copyright laws.

For reliable and affordable growth services, visit the free youtube views and boost your channel instantly.

Best Practices for High-Quality Audio Extraction

  • Always choose converters that support 320kbps bitrate for crisp sound.
  • Avoid shady sites that ask for unnecessary permissions.
  • Use desktop tools for large files — they’re faster and more stable.
  • Keep antivirus protection active when downloading files.

Following these steps ensures your audio files remain clean, safe, and high quality.

Alternative Ways to Get Audio Legally

If you prefer 100% legal options, try these methods:

  • YouTube Premium – Allows offline playback within the app.
  • Spotify or Apple Music – Stream or download songs legally.
  • Creative Commons Channels – Offer royalty-free music for personal and commercial use.

How to Rip Audio from YouTube Safely in 2025

Cyber threats have increased, so always:

  • Avoid clicking pop-up ads.
  • Use official download buttons only.
  • Prefer HTTPS websites.
  • Keep your browser updated.

These simple precautions will keep your computer safe while you rip audio from YouTube.

how-to-rip-audio-from-youtube-2025

HOW TO DO IT?

If you want to rip audio safely, open FreeDownloadTools.com, paste your YouTube video link, select “MP3,” and hit the convert button. In seconds, you’ll get a high-quality audio file ready to play on your phone or computer. This is one of the simplest and safest ways to convert videos to audio without installing software.

Conclusion

Ripping audio from YouTube is easy and useful, especially for personal listening or offline use. Just remember to respect copyrights and choose trusted platforms. Now that you know how to rip audio from YouTube, you can save your favorite tracks and enjoy them anytime, anywhere.

Final Thoughts

Learning how to rip audio from YouTube isn’t just about convenience — it’s about making your favorite content more accessible and portable. Whether you’re saving motivational speeches, relaxing soundtracks, or podcasts, make sure to use trusted tools and respect copyright laws. In 2025, with so many fast and secure converters available, downloading high-quality MP3s has never been easier.

En savoir plus
How to Take a Screenshot on Mac (2025 Guide for Beginners)

How to Take a Screenshot on Mac (2025 Guide for Beginners)

Taking screenshots on a Mac is one of those things every user should master. Whether you’re creating tutorials, saving images, or sharing a portion of your screen, knowing how to take a screenshot on Mac efficiently makes your workflow smoother. This 2025 guide covers every method — from keyboard shortcuts to advanced tools — so you can capture your screen like a pro.

How to Take a Screenshot on Mac Using Keyboard Shortcuts

When it comes to speed, nothing beats keyboard shortcuts. Apple has built in several easy options for taking screenshots instantly.

  • Command (⌘) + Shift + 3 – captures the entire screen.
  • Command (⌘) + Shift + 4 – lets you select a specific part of the screen.
  • Command (⌘) + Shift + 4 + Spacebar – captures a particular window.
  • Command (⌘) + Shift + 5 – opens the screenshot toolbar, giving you more options like screen recording and saving preferences.

These shortcuts work on every Mac model — MacBook Air, MacBook Pro, and iMac.

How to Take a Screenshot on a Mac Computer (Using Screenshot Toolbar)

Another simple way to capture your screen is by using the built-in Screenshot Toolbar. If you’re wondering how to take a screenshot on a mac computer for tutorials or documentation, this is your best method.

  1. Press Command (⌘) + Shift + 5.
  2. The toolbar will appear at the bottom of your screen.
  3. Choose whether you want to capture the entire screen, a window, or a selected area.
  4. Click “Options” to set a timer or select the save location.
  5. Press “Capture” to finish.

The Screenshot Toolbar also allows you to record videos, making it perfect for creating guides or software demos.

For more social media growth tips, explore our offer to get free Instagram followers.

How to Take a Screenshot on Mac Air

If you’re using a MacBook Air, the process remains the same. However, due to its smaller display, you may prefer using selection shortcuts for precision.

  • Use Command (⌘) + Shift + 4 for selected regions.
  • Use Command (⌘) + Shift + 3 for the full screen.
  • After capturing, a small thumbnail appears in the corner — click it to edit, crop, or annotate your image before saving.

This quick-edit feature makes how to take a screenshot on mac air incredibly convenient for students, designers, and professionals alike.

How to Take a Screenshot on Computer Mac Using Preview

The Preview app is another powerful way to capture screenshots, especially if you prefer using a visual interface instead of shortcuts.

  1. Open the Preview app.
  2. Go to File → Take Screenshot.
  3. Choose From Entire Screen, From Window, or From Selection.
  4. Edit or export your image directly in Preview.

This method is great for people who need editing options right after the capture.

how-to-take-a-screenshot-on-mac-2025-guide-blog-likeprovider-net.jpg

How to Customize Screenshot Settings

macOS gives users full control over how screenshots are taken and saved. Open the Screenshot Toolbar (Command + Shift + 5) and explore:

  • Save Location – choose Desktop, Documents, or Clipboard.
  • Timer – set a 5 or 10-second delay.
  • Show Mouse Pointer – display or hide the cursor.
  • Screen Recording – record your entire screen or specific area.

These options make how to take a screenshot on mac more flexible than on Windows or ChromeOS.

How to Organize Your Screenshots

If you take many screenshots daily, keeping them organized is essential.

  • Create a “Screenshots” folder in Documents.
  • Rename each file descriptively (for example, “Project-Dashboard-Jan2025.png”).
  • Use Command (⌘) + Control + Shift + 4 to copy the screenshot directly to the clipboard instead of saving it.

How to Edit Screenshots Quickly

After capturing, you’ll see a small preview thumbnail in the bottom-right corner. Click it to instantly open editing options:

  • Crop or resize the image.
  • Add arrows, highlights, or text.
  • Blur sensitive areas.
  • Share directly via AirDrop, Mail, or Messages.

This built-in editing tool saves time and helps polish your screenshots before sharing them online.

Troubleshooting Screenshot Problems

If none of the shortcuts work, check these steps:

  • Go to System Settings → Keyboard → Shortcuts → Screenshots and ensure they’re enabled.
  • Check your save location (Desktop or Documents).
  • Restart your Mac to reset temporary issues.

If you still face problems, updating macOS usually solves compatibility glitches with screenshots or keyboard shortcuts.

Best Screenshot Editing Apps for Mac

While the built-in tools are powerful, third-party apps can add even more functionality. Here are some popular options:

  • CleanShot X – advanced annotations and cloud sharing.
  • Snagit – professional-grade capturing and video editing.
  • Monosnap – quick sharing and integrated cloud storage.

Using one of these tools makes how to take a screenshot on computer mac even more versatile for professional users.

how-to-take-a-screenshot-on-mac-best-editing-apps-blog-likeprovider-net

Final Thoughts

Learning how to take a screenshot on mac is an essential skill for everyday productivity. From simple shortcuts to advanced toolbar features, Apple gives users every tool needed to capture, edit, and share their screens instantly.

Whether you’re on a MacBook Air, MacBook Pro, or iMac, mastering these steps will make your work faster and your visuals clearer. With this 2025 guide, you can now capture anything on your screen in seconds.

Verify official macOS screenshot shortcuts and methods via the Apple Support page.

En savoir plus
How to Change Apple ID Password (2025 Guide)

How to Change Apple ID Password (2025 Guide)

Keeping your Apple account secure is vital in today’s digital world. Your Apple ID gives access to everything — from iCloud photos to App Store purchases — so knowing how to change Apple id password is essential for your privacy and protection.
This guide explains all methods, from iPhone and Mac to browser solutions, and covers special cases like the iPad 9th generation and Chinese language settings.


Why You Should Know How to Change Apple ID Password

Your Apple ID holds personal data, financial information, and synced content across devices. Regularly changing your password prevents unauthorized access and strengthens security.
Apple recommends updating your password if:

  • You recently shared your device.
  • You noticed suspicious login attempts.
  • You used your Apple ID on a public computer.
  • You haven’t changed it for several months.

Learning how to change your Apple ID password is the easiest way to stay protected.


How to Change Apple ID Password on iPhone or iPad

Here’s the simplest method to update your password using your iPhone or iPad:

  1. Open Settings on your device.
  2. Tap your Apple ID name at the top.
  3. Go to Sign-In & Security or Password & Security (depending on your iOS version).
  4. Tap Change Password.
  5. Verify using your device passcode.
  6. Enter your new password and confirm it.

Apple will automatically log your new credentials into iCloud, App Store, and other Apple services.
This is the most direct way if you wonder how to change my Apple ID password quickly without using a computer.

how-to-change-apple-id-password

How to Change Apple ID Password on a Mac

If you’re on a MacBook or iMac, follow these steps:

  1. Click the Apple menu () at the top-left corner.
  2. Open System Settings (or System Preferences).
  3. Click Apple IDSign-In & Security.
  4. Choose Change Password.
  5. Verify your identity and set a new password.

Your Mac will sync this new password with all Apple devices connected to your ID. It’s the most convenient way if you’re wondering how to change my password in Apple ID on desktop.


How to Change Your Apple ID Password Using a Web Browser

If you don’t have access to your devices, you can still change Apple ID password online:

  1. Visit appleid.apple.com.
  2. Sign in with your Apple ID credentials.
  3. Select Sign-In & SecurityPassword.
  4. Enter your old password and create a new one.
  5. Click Change Password to confirm.

This method works on Windows, Android, and any browser, making it ideal for those away from Apple hardware.


How to Change iPad 9th Apple ID Password (Chinese Language)

If your iPad 9th generation is set to Chinese language, here’s how to navigate the interface:

  1. 打开“设置” (Open Settings).
  2. 点击顶部的您的名字 (Tap your name at the top).
  3. 选择“密码与安全性” (Select Password & Security).
  4. 点击“更改密码” (Tap Change Password).
  5. 输入新密码并确认 (Enter and confirm your new password).

Even if the interface is in Chinese, the steps remain identical — Apple maintains the same menu order globally. So you can easily change your Apple ID password regardless of region or language.


How to Reset Apple ID Password If You Forgot It

If you forgot your password, follow this quick process:

  1. Go to iforgot.apple.com.
  2. Enter your Apple ID email.
  3. Verify using your trusted phone number or two-factor authentication code.
  4. Create a new password when prompted.

This works even if you no longer have access to one of your devices. It’s the fastest way for users asking how to change Apple ID password when they can’t log in.


What to Do After Changing Your Apple ID Password

After updating your password, follow these best practices:

  • Sign out of unknown devices under Settings → Devices.
  • Update your password in Safari, iCloud Keychain, and Mail.
  • Turn on two-factor authentication for better protection.
  • Review recovery email and phone number to ensure accuracy.

Changing your password is the first step; securing it properly keeps your account protected long-term.


Common Problems When Changing Apple ID Password

If you face issues while trying to change Apple ID password, try these fixes:

  • Ensure Wi-Fi connection is stable.
  • Update to the latest iOS or macOS version.
  • Clear cache or restart your device.
  • Try signing out and back in before retrying.

Apple’s systems may take a few minutes to sync password changes across devices — patience helps!


Security Tips After You Change Apple ID Password

  • Don’t reuse old passwords.
  • Combine uppercase, lowercase, symbols, and numbers.
  • Avoid sharing passwords or saving them in insecure apps.
  • Use iCloud Keychain to generate strong passwords automatically.

By following these, you ensure the maximum security of your Apple account in 2025.


How to Change Apple ID Password Quickly – Best Short Method

If you just want the fastest route:
Go to Settings → [your name] → Sign-In & Security → Change Password, enter your device passcode, type a new password, and tap Change. That’s it!
Now you know how to change Apple ID password without any confusion.

how-to-change-apple-id-password-quickly

How Often Should You Change Apple ID Password?

Experts recommend changing it every 3–6 months. However, if you ever notice strange login alerts, unknown devices, or unauthorized App Store purchases, update it immediately.

Your Apple ID protects sensitive information — treating it like your digital identity is key.


Final Thoughts on How to Change Apple ID Password

Changing your Apple ID password doesn’t have to be complicated. Whether you’re on iPhone, iPad, or Mac, Apple provides clear options to keep your account secure.

Knowing how to change your Apple ID password gives you complete control of your privacy and helps safeguard your entire Apple ecosystem. Take a few minutes today to review your settings and ensure you’re fully protected.

For professional social media growth, explore our offer to SMM panel the most affordable and trusted platform for influencers.

En savoir plus