How to Comment Anonymously on Facebook Group (Step-by-Step Guide)
Facebook groups are one of the most active places on the internet for discussions, advice, and community support. However, many users hesitate to engage because they don’t want their real profile attached to sensitive opinions, questions, or experiences. This naturally leads to one common question: how to comment anonymously on Facebook group content.
In this guide, you’ll learn what is possible, what is not, and how anonymous features actually work inside Facebook groups. We’ll also explain common misunderstandings, limitations, and practical workarounds—without fake promises or misleading tricks.
What Does “Anonymous” Really Mean on Facebook Groups?
Before explaining how to comment anonymously on Facebook group posts, it’s important to clarify what Facebook means by anonymous.
On Facebook, anonymity does not mean:
Being completely invisible to admins
Hiding your identity from Facebook itself
Commenting anonymously in every group
Instead, anonymity on Facebook groups is feature-based and limited. It only works inside specific groups where admins have enabled anonymous posting.
Can You Comment Anonymously on Facebook Groups?
Short answer: It depends on the group.
Facebook currently allows:
✅ Anonymous posts (in supported groups)
❌ Anonymous comments in most cases
This is where confusion begins. Many users search for how to comment anonymously on Facebook group because they see anonymous posts and assume comments work the same way—but they usually don’t.
Important Truth
👉 Facebook does NOT officially support anonymous comments in most groups.
If you comment on a post (even an anonymous one), your real profile name is shown.
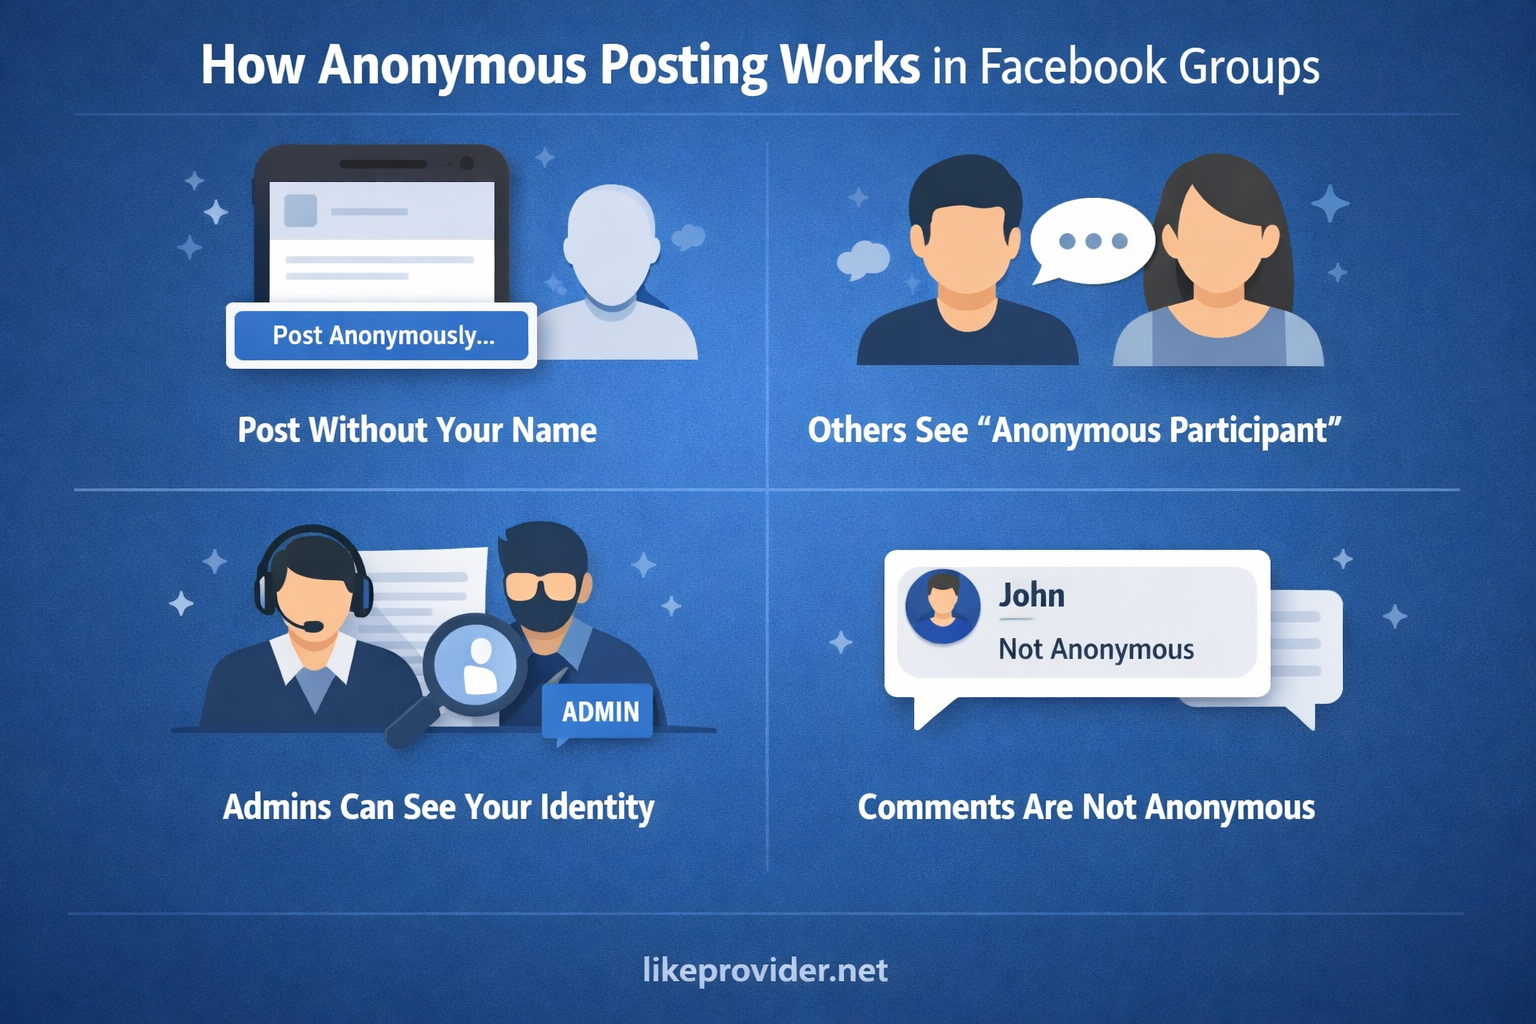
How Anonymous Posting Works in Facebook Groups
Some groups enable an option called “Anonymous Posts.” When enabled:
You can create a post without showing your name
Other members see “Anonymous Participant”
Group admins and moderators can still see your identity
Comments under that post are usually NOT anonymous
This is critical to understand before trying to learn how to comment anonymously on Facebook group discussions.
Step-by-Step: How to Post Anonymously in a Facebook Group
Even though commenting anonymously is limited, here’s how anonymous posting works:
Step 1: Join a Group That Supports Anonymous Posts
Not all groups allow this. The admin must enable it.
Step 2: Click “Write Something…”
If anonymous posting is enabled, you’ll see an option like:
“Post anonymously”
Step 3: Enable Anonymous Mode
Toggle the anonymous option and confirm.
Step 4: Publish Your Post
Your post appears without your name, but admins still know who you are.
⚠️ Reminder: This does NOT mean you can comment anonymously afterward.
Why Facebook Does Not Allow Anonymous Comments
Facebook restricts anonymous comments for several reasons:
Abuse Prevention – Anonymous comments increase harassment risks
Moderation Control – Admins need accountability
Policy Compliance – Facebook enforces real-identity engagement
That’s why searches for how to comment anonymously on Facebook group often lead to misleading or fake solutions online.
Common Myths About Anonymous Facebook Comments
Let’s clear up some misinformation 👇
❌ Myth 1: “Fake accounts allow anonymous comments”
False. Fake accounts still show a name and can be banned.
❌ Myth 2: “VPN or browser tricks hide identity”
No. VPNs do not hide your Facebook profile name in comments.
❌ Myth 3: “Third-party tools enable anonymous comments”
Dangerous and false. These tools often violate Facebook’s terms.
Safe Workarounds If You Want to Stay Anonymous
If your goal is privacy rather than technical anonymity, here are safe alternatives:
1. Use Anonymous Posts Only
If the group supports it, post anonymously and avoid commenting.
2. Ask the Admin to Enable Anonymous Q&A
Some groups allow admins to post questions anonymously on your behalf.
3. Create a Privacy-Focused Secondary Profile (Carefully)
Must follow Facebook’s real-identity rules
Use minimal personal information
Avoid impersonation
⚠️ This is not true anonymity, but it reduces exposure.
If you’re looking for safe ways to grow engagement while protecting your privacy, you can explore SMM panel as an alternative to risky anonymous methods.
Can Group Admins See Anonymous Users?
Yes—always.
Even when you use anonymous posting:
Admins see your real profile
Facebook logs all activity
Law enforcement requests can identify users
So when learning how to comment anonymously on Facebook group, remember: anonymity is partial, not absolute.
If you’re concerned about profile visibility and privacy in Facebook groups, you can also check out Facebook profile viewer to better understand what information is publicly visible.
Why the “Anonymous Comment” Option Is Missing
If you don’t see any anonymous options, it means:
The group admin disabled it
The group type doesn’t support it
Facebook removed it due to policy violations
There is no way for users to force-enable anonymous comments.

Is It Possible in the Future?
Facebook tests features regularly, but as of now:
Anonymous comments are not widely supported
Anonymous posts remain the only official method
So any guide promising a “secret trick” for how to comment anonymously on Facebook group comments should be treated with skepticism.
Final Verdict: The Honest Answer
Let’s be 100% clear and transparent:
✔️ You can post anonymously in some Facebook groups
❌ You cannot reliably comment anonymously in Facebook groups
✔️ Admins always know your identity
❌ Tools and hacks claiming full anonymity are unsafe
If privacy matters, use anonymous posts responsibly and follow group rules.
Frequently Asked Questions (FAQ)
Can I comment anonymously on an anonymous Facebook post?
No. Your name usually appears when commenting.
Can admins see anonymous comments?
Yes—admins can see all identities.
Is there a safe tool for anonymous comments?
No official or safe tool exists.
Will Facebook add anonymous comments?
No public confirmation so far.
Summary
If you searched for how to comment anonymously on Facebook group, the most important thing to remember is this:
👉 Facebook limits anonymity by design.
Use the platform responsibly, avoid risky tools, and understand the real boundaries of anonymous interaction.
You can find Facebook’s official explanation of anonymous posting directly in Facebook’s Help Center documentation on anonymous posts in groups, which clearly outlines who can see your identity and how the feature works.